Winter can be remarkably unforgiving on a home’s guttering system. Between freezing temperatures, heavy rainfall, fallen leaves, and the relentless freeze-thaw cycle, your gutters take quite a battering over the colder months. Come spring, taking the time to carry out a thorough inspection could save you from a far more expensive repair job further down the line.
Blocked or damaged gutters can lead to water ingress, damp walls, saturated foundations, and rot in your fascia boards, none of which are cheap to put right. The good news is that a basic inspection requires little more than a ladder, a pair of gloves, and a few minutes of your time.
This guide will walk you through everything you need to know about checking your gutters after winter, from the tools you will need to the warning signs you should watch out for.
Why it Matters to Check Your Gutters After Winter
Gutters serve a simple but critical purpose: they channel rainwater away from your home’s roof, walls, and foundations. When they become blocked, cracked, or pull away from the fascia, water has nowhere to go but downwards straight into the fabric of your house.
Over winter, several issues commonly develop. Leaves, twigs, and moss can accumulate and form blockages, trapping standing water. Ice and frost can cause joints to crack or pull apart as water expands when it freezes. High winds may loosen brackets and fittings, causing sections to sag or separate. Heavy snowfall adds considerable weight, which can pull gutters away from the roofline. Birds and squirrels may also nest in downpipes, causing blockages that are not immediately visible.
Tools and Equipment You Will Need
Before you begin your inspection, gather the following:
- A sturdy ladder, an extension ladder is ideal for two-storey properties
- Rubber or heavy-duty work gloves to protect your hands from debris and sharp edges
- A garden trowel or gutter scoop for removing accumulated muck
- A garden hose with a trigger nozzle to flush gutters and check for proper drainage
- A bucket or bin bag for collecting debris
- A torch to peer inside downpipes and shadowed sections
- Safety goggles if there is any risk of debris falling into your eyes
Safety First
Working at height is one of the leading causes of DIY injuries in the UK. Before you climb a ladder, please take the following precautions:
- Always use a ladder on firm, level ground. If the surface is soft or uneven, use a ladder stabiliser or standoff.
- Never overreach to either side, move the ladder instead.
- Have someone hold the base of the ladder if possible.
- Avoid working in wet or windy conditions.
- If your property has a particularly steep roof or difficult access, consider hiring a professional instead.
Step-by-Step Inspection Guide
Follow these steps systematically, working your way around the full perimeter of your home.
Step 1: Carry Out a Ground-Level Visual Inspection
Before you even fetch your ladder, walk around the outside of your property and look up at the guttering. You are looking for any obvious signs of sagging, sections that have pulled away from the fascia, or joints that appear to have separated. Staining on the exterior walls — particularly green or brown streaks running vertically — is a telltale sign that water has been overflowing or leaking.
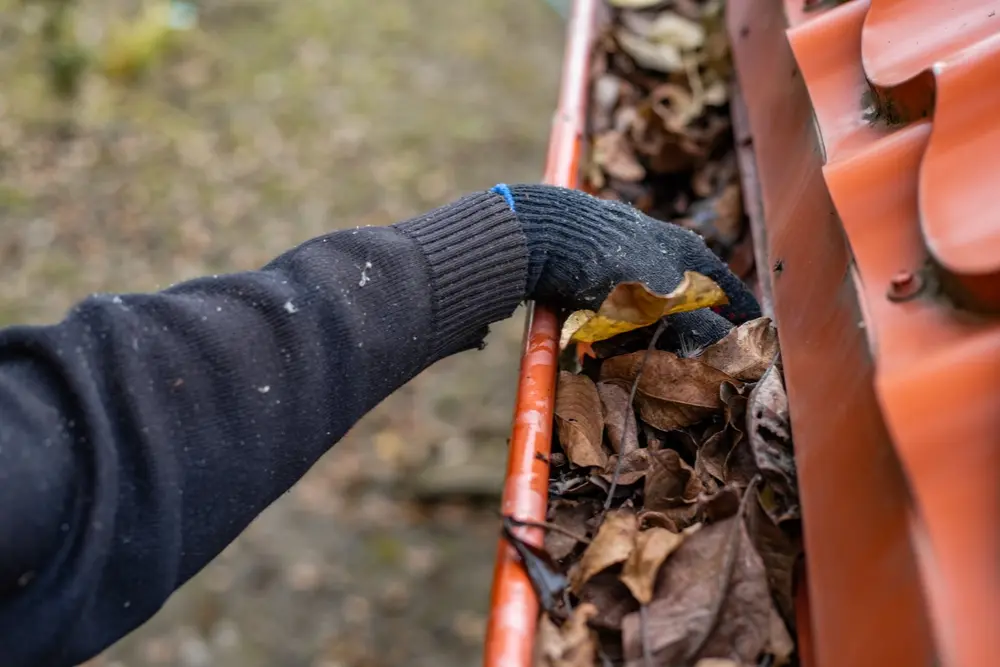
Step 2: Clear Out Debris
Once safely on your ladder, put on your gloves and begin scooping out any accumulated leaves, moss, and general muck. Work from the end of the gutter farthest from the downpipe towards it, pushing debris into your bucket as you go. Pay particular attention to corners and joints, where blockages tend to build up.
If your gutters have a significant moss problem, it is worth treating the roof with a moss killer to prevent regrowth, as moss spores wash down into the guttering with every rainfall.
Step 3: Flush the Gutters with Water
Once cleared, use your garden hose to flush water along the full length of the gutter. Start at the end farthest from the downpipe and work towards it. The water should flow freely and exit cleanly through the downpipe. Watch out for the following:
- Pooling water suggests the gutter has sagged and lost its fall, the slight downward slope towards the downpipe.
- Water leaking from joints indicates failed sealant or worn rubber seals.
- Overflow from the back of the gutter may suggest the gutter is not sitting correctly against the fascia.
Step 4: Check the Downpipes
Downpipes are just as important as the gutters themselves, and they are often overlooked. Push your hose into the top of the downpipe and run water through it. It should flow freely from the bottom. If it backs up or drains slowly, there is likely a blockage inside.
Blockages in downpipes can often be cleared using a drain rod or a length of stiff wire. More stubborn blockages — particularly where a nest has formed — may require the pipe to be dismantled. Most modern plastic downpipes are clipped together and can be disassembled without tools.
Also check where the downpipe meets the drain or soakaway at ground level. Ensure it is securely connected and that water is not simply pouring onto the ground against your property’s foundations.
Step 5: Inspect Brackets, Fixings, and Joints
Working your way along the guttering, check that all brackets are firmly attached to the fascia board. Gently press down on the gutter — it should not flex unduly. Look for loose or missing screws in the brackets, cracks or splits in the gutter channel itself (particularly at joints), signs of rust on metal guttering, and deterioration in the fascia board behind the brackets, which may indicate rot.
Step 6: Examine the Fascia and Soffits
While you are up on the ladder, take a moment to look at the condition of your fascia boards and soffits — the horizontal boards that your gutters are attached to, and the underside of the roof overhang respectively. Look for any soft, dark, or crumbling wood, as this is a sign of rot, which can spread quickly if left unattended. Damaged fascia boards must be repaired or replaced before new guttering is fitted, as they form the structural support for the entire system.
Common Problems to Look For
During your inspection, keep an eye out for these frequently encountered issues:
- Sagging sections: Often caused by accumulated debris or weakened brackets. The gutter should always slope gently towards the downpipe — typically around 6mm for every 3 metres of run.
- Leaking joints: The sealant between sections deteriorates over time, particularly after temperature extremes. Joints can be re-sealed with gutter sealant, available from most builders’ merchants.
- Cracks and splits: Plastic guttering can become brittle with age and crack in cold weather. Small cracks can be patched, but extensive cracking usually means the section needs replacing.
- Rust (on cast iron or steel guttering): Surface rust can be treated with rust converter and repainted, but deep corrosion may necessitate full replacement.
- Separated downpipes: Connections can come apart over winter. Downpipe clips can be refitted or replaced cheaply and easily.
DIY Repairs vs Calling a Professional
Many minor gutter repairs are well within the scope of a competent DIYer. Resealing leaking joints, replacing individual brackets, clearing blockages, and patching small cracks are all straightforward jobs that require only basic tools and modest expenditure.
However, there are situations where it is sensible to call in a professional: if your property is more than two storeys high and you do not have appropriate access equipment; if the fascia boards are rotten and need replacing before new guttering can be fitted; if you have cast iron guttering that is heavily corroded or damaged; or if a full replacement is required, in which case a professional will ensure the new system is correctly pitched and properly sealed.
Keeping Your Gutters in Good Condition Year-Round
A post-winter check is a good habit to get into, but ideally gutters should be inspected twice a year — once in late autumn after the leaves have fallen, and once in spring. If you have overhanging trees, you may find they need attention more frequently.
A few simple measures can help keep your gutters in good order. Gutter guards — mesh or foam inserts that sit inside the channel — can significantly reduce the amount of debris that collects. Trimming back overhanging branches reduces leaf fall and the risk of damage in high winds. Applying a roof moss treatment each year also prevents the build-up of moss and algae that can wash into gutters and cause persistent blockages.
Final Thoughts
Checking your gutters after winter is one of those small maintenance tasks that is easy to put off, but the consequences of neglect can be significant. A few hours spent clearing, flushing, and inspecting your guttering each spring is a modest investment of time that can protect your home from water damage, damp, and the expensive repairs they bring.
If in doubt about any aspect of the inspection or repair, do not hesitate to seek the advice of a qualified plumber or drain specialist. Most will be happy to carry out an assessment and provide a no-obligation quote for any work required.
Take care of your gutters, and they will take care of your home.